Address Pool
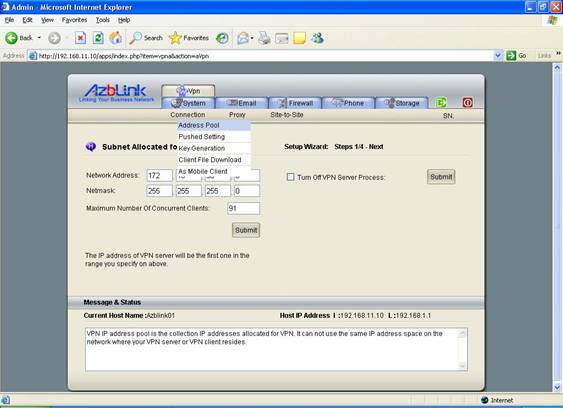
It is necessary to specify the subnet that will be used as VPN. This subnet should not be used anywhere in your local network environment to avoid network conflict. The first IP address of this subnet will be used as the IP address of the VPN interface in the server.
Example: Allocating VPN address pool
If we want to create a VPN with address in 172.16.38.0/24, in other words, all the “virtual Ethernet interfaces” will be with IP address from 172.16.38.1 to 172.16.38.255, we can set as follows in VPN->Connection->Address Pool:
Network Address: 172.16.38.0
Netmask: 255.255.255.0
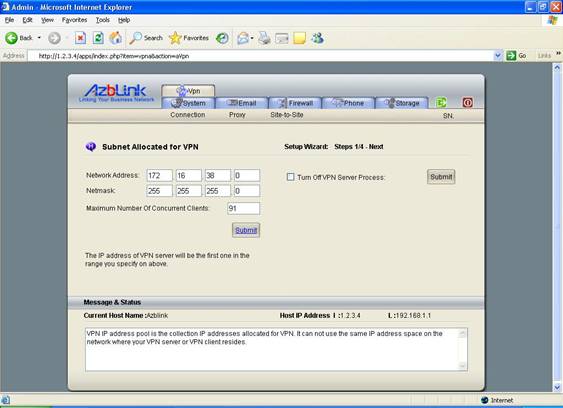
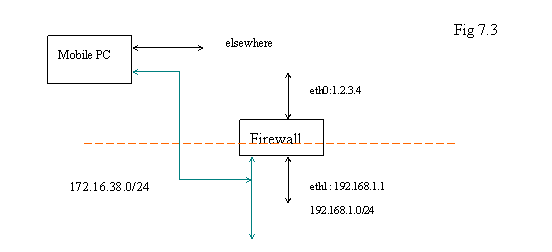
And please notice that the virtual Ethernet interface on Border Control will be with IP address 172.16.38.1 once VPN server on Border Control is started.
Example: Address Collision for VPN
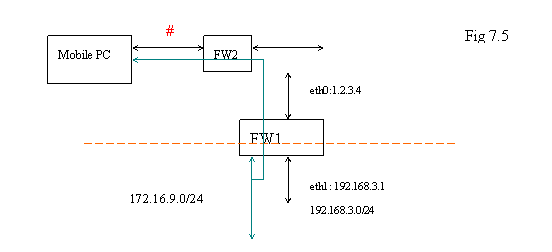
Let’s check the following diagram. If FW1 is the firewall of your office with VPN server, you bring your mobile PC to other people’s office with firewall FW2 that is indicated as below.
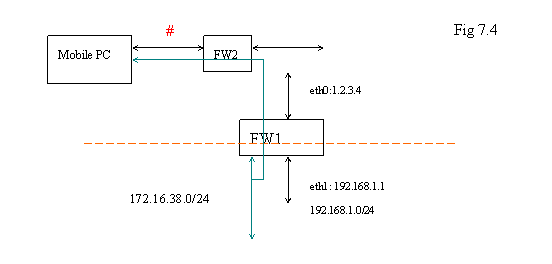
Of course, the other people will not know your VPN; they just set up their network by using private IP address space. Thus, if their local network ( indicated as “#” in the diagram ) is also “172.16.38.0/24” – same as your VPN setting, what would happen? In general, the applications on your Mobile PC would not be able to know which one is VPN because they look as the same network to those applications.
What if “#” is “192.168.1.0/24” ? It is same as the local network of your office. In this case, you will have the chance to connect to FW1 by using “172.16.38.1”. But you can not go across the subnet because the application does not know which “192.168.1.0/24” you are going to connect to. The situation might be worse if you push the routing entry to the mobile PC and ask the Mobile PC to route all the traffic with destination “192.168.1.0/24” to the virtual Ethernet interface on Mobile PC. The original “normal” traffic will be messed up in this setting. Those are the things you should notice when you use VPN.
Of course, if you use the public IP address space for VPN, you would never have to worry about the address collision problem. But it might be more difficult to get large chunk of public IP addresses and use them in this way.
Pushed Setting
Once VPN clients are connecting to the VPN server, some of the network setting might be “pushed” to the client side so that the associated VPN clients can “learn” the topology of network on VPN server side. Here two kinds of settings can be pushed to clients: network routing rules and Windows naming service server ( known as WINS server ).
If the targeting network inside your own firewall is 192.168.3.0/24 and the VPN is with the address 172.16.9.0/24, on the client side, we need to route the network traffic with destination IP address inside the network 192.168.3.0/24 to the VPN gateway ( in this case, it should be 172.16.9.1 ). You can have the following setting at VPN->Connection->Pushed Setting:
Destination network: 192.168.3.0
Netmask: 255.255.255.0
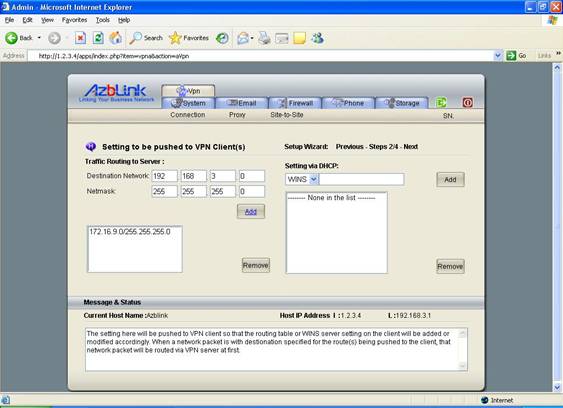
And press “Add” button. So, traffic originated from Mobile PC with destination to the network 192.168.3.0 will be routed via the virtual Ethernet interface for VPN on mobile PC.
But you have to make sure that your mobile PC is sitting in the network that is not conflicting with this setting. Otherwise, the routing table your mobile PC will not function well.
You might ever think of the following scenario: you bring your mobile PC outside your office and use VPN to connect back to your office network. Once you are in your office network, you are thinking to route all the traffic to the VPN gateway, especially when you want to access the hosts outside your office firewall. You hope that all the traffic from your mobile PC somewhere will go to the office and go out from your own office to access the hosts outside your office firewall.
However, if you just manually set the default gateway on each mobile PC to the VPN gateway, you will find out it does not work at all. Usually, network setting is involved with many things. When you change the default gateway on your mobile PC, it also impedes the original function by directing your “tunnel traffic” to VPN server.
If you want to do something similar to this, we suggest you use Proxy to redirect certain type of traffic into different route. We will have an example about how to do that once we introduce Proxy.
Key Generation
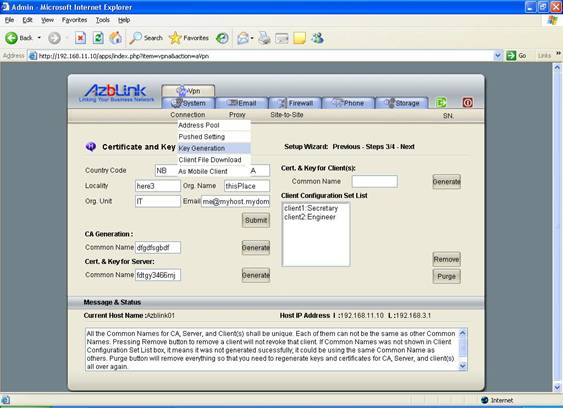
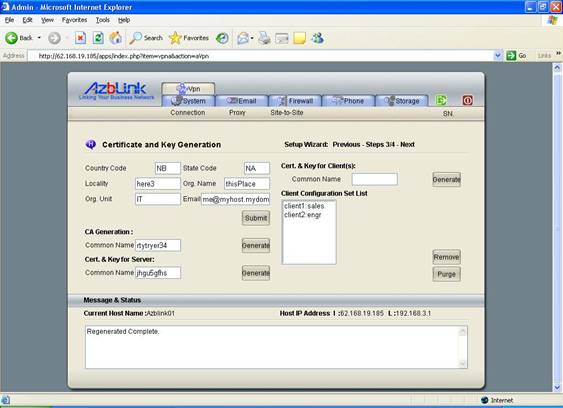
To establish the tunnel on the public network between VPN server and clients, there are different keys and certificates for each identify on the network: CA Generation, Certificate and Key for server, certificates and keys for clients, and client configuration listing.
The following 5 items are the information to be used as part of all the keys and certificates:
Country Code
State Code
Locality
Org. Name
Org. Unit
Email
Combining with Common Name that will be asked to input for each and other random generated messages, certificates and keys will be produced. So, you have to use different Common Name in each box on the screen to differentiate them.
CA is the abbreviation for Certificate Authority. Basically, server and clients have knowledge on their CA so that the connection is allowed to be established. There are several fields that you need to fill in while generating CA in order to generate unique CA that is different from others.
The “common name” on each client, server and CA shall also be unique. Keys and certificates will be generated after the correct data is supplied. On the listing of client configuration sets, the common names will also be listed there. If common names are not shown there in Client configuration Set List, it means the common name could be duplicated, and although the duplicated one was deleted, it is still not safe to let the clients use the common name like that. In this case, you might as well just clean up everything by pressing “Purge” button to re-generate CA, Server key and certificate, and client keys and certificates from scratch.
One of the reasons to do this is: once a set of client setting is distributed, removal of the configuration file set of that client does not block it to access VPN Server. The only way to control the access of VPN server is to re-generate all the keys and certificates.
The whole idea here is that we are going to prepare a set of files for the VPN client program for those users would like to access office network they are not in the office. Once they have this set of files and VPN client program, they can establish the connection with the VPN server located in the office.
The validity of certificates and keys is being set for 10 years. It means it expires after 10 years. However, if you change the keys and certificates, the keys and certificated issued previously are automatically nullified.
Client File Download
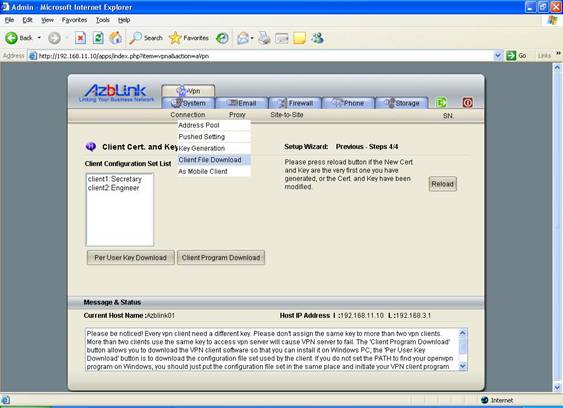
Once the configuration of CA, Server and Client(s) is done, a set of files for each client will be generated. Each client needs a set of this kind of configuration files in order to connect to the VPN server. Please notice that the configuration file also contains the public IP address of the firewall ( the IP address of Internet interface eth0 ). Thus, you only can wait the other setting of network is stable before you configure and generate VPN-related files.
Button “Per User Key Download” means to download VPN client configuration files; “Client Program Download” means to download all VPN client package on Windows.
Example: How to use VPN client software on Windows PC
Once the VPN server is ready, the admin folk needs to distribute a set of files ( configuration management, key, certificate, VPN client software ) to the people who need to use VPN. Take the following screenshot as an example: there are two set of VPN clients: client1 ( with common name “sales” ) and client2 ( with common name “engr” ). And you move to Client File Download screen to prepare to download files.
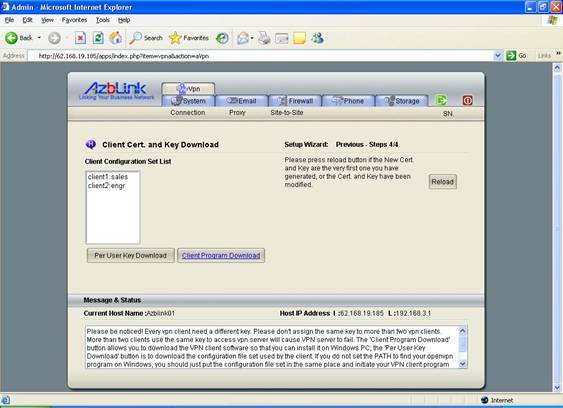
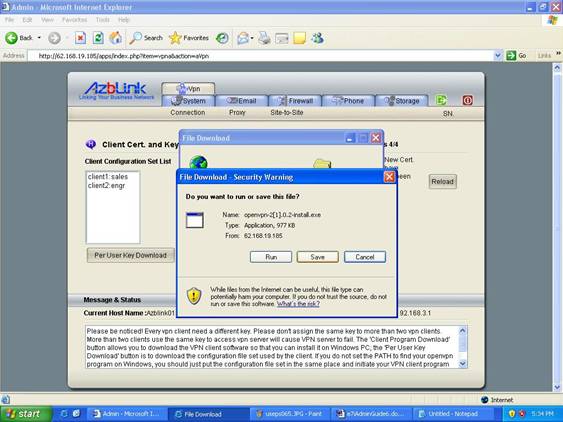
To download VPN client software, you press button “Client Program Download”. It will display a File Download screen. Just press “Per User Key Download” to save the file into a folder you can remember. Later on, we are going to install the VPN client program from there.
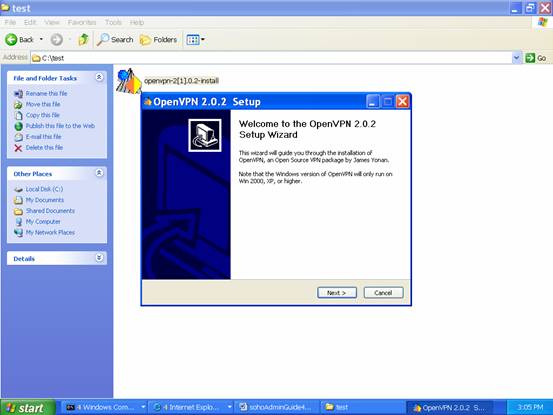
And then, we “double click” the icon to start the installation process.

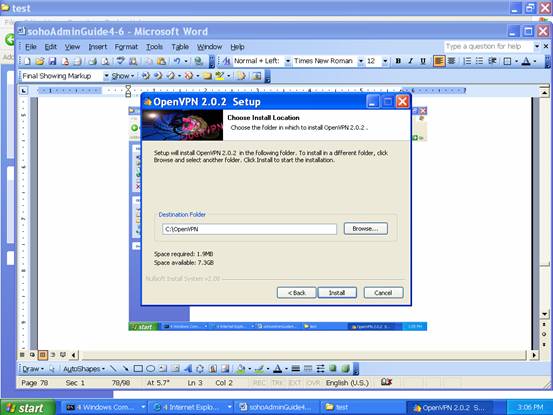
It prompts the setup menu and asks where you are going to install the software. In this example, we just install the software at C:\OpenVPN .
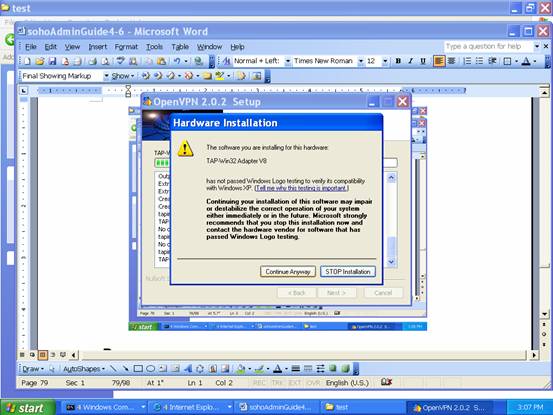
Do not be scared. Just Press “Continue Anyway” to finish the installation.
Up to this moment, we have VPN client installed at the place C:\OpenVPN on Windows System. Now let’s go back to that “Client File Download” page to download the key and certificate. This is the machine to be used by sales; thus, we put the set “client1” with common name “sales” on this machine. Select “client1” and press “start”.
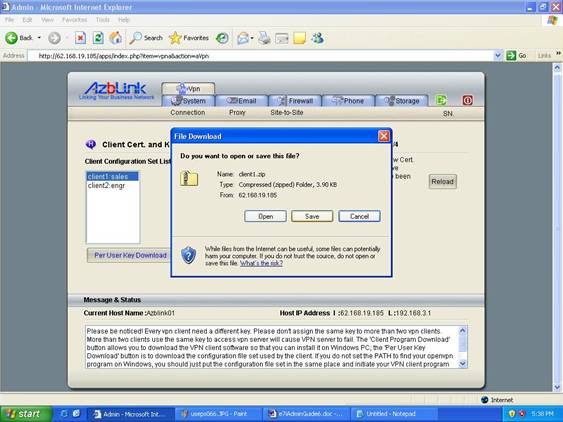
Press “Save” and save it in C:\OpenVPN\bin . “C:\OpenVPN” is the directory you installed the VPN client program. Under that directory, there is subdirectory “bin”. Just save the zip file there. It will be easier for you to continue the following steps.
Go to the folder C:\OpenVPN\bin, and decompress the file “client1.zip” in that directory. “zip” file can be decompressed from Windows utility or any other programs.

After decompressing file, you will find 4 more files are in that directory. They are certificate of CA, key file of client1, certificate file of client1, and configuration file for you to connect back to VPN server.

To start the VPN connect, you can start Windows command prompt window. Type “cmd” at Start->Run under Windows to launch that command windows.

And use “cd \OpenVPN\bin” to switch your working directory to “C:\OpenVPN\bin”. In that directory, we start VPN client program by reading the configuration file “client1.ovpn” by typing the command:
C:\> openvpn client1.ovpn

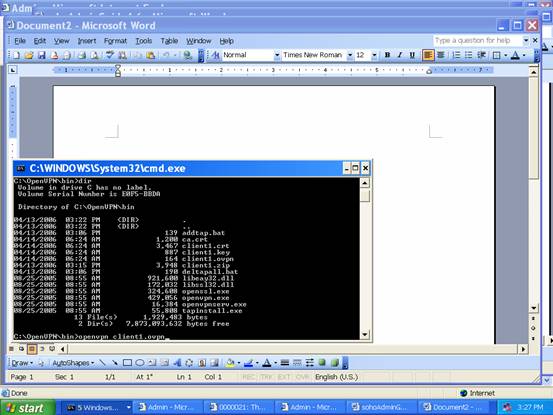
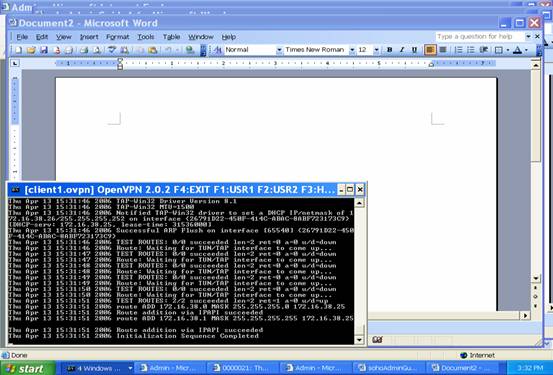
After the command “openvpn client1.ovpn” is issued by hit “enter” key, it starts the negotiation process to establish the connection. Check if you can find any word like “succeed” or “Initialization Sequence Completed”.
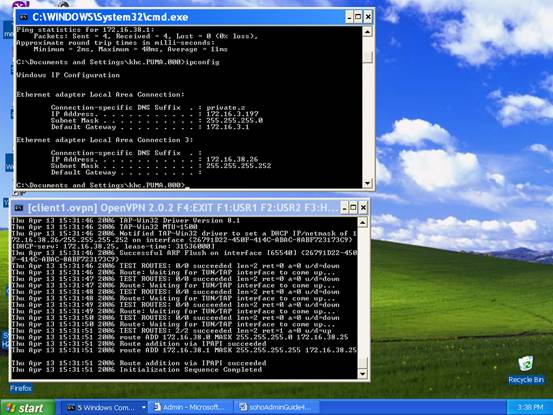
Type “ipconfig “ in Windows command prompt, you will find out there is one more Ethernet interface shown. It is the “virtual Ethernet interface” created by VPN client software. And it is with IP address belonging to VPN .
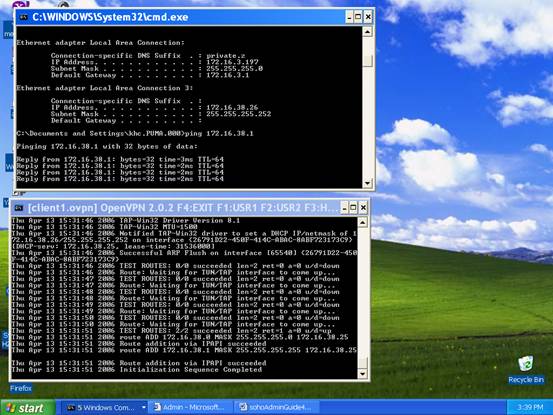
You can do “ ping 172.16.38.1” ( the IP address of VPN server on this virtual network ) and it gets response packets. This proves that the connection is established from the mobile PC to VPN server in the office.
To close the VPN connect, you just “double click” the Left Top icon on the Windows Command prompt. You only need to install the VPN client program once. But you might have to update the set of files for key, certificates, and configuration file in the future; it just depends on how often your VPN server admin wants to update those setting.
Every time you want to launch VPN connection, you just go to the directory C:\OpenVPN\bin and issue the command
C:\OpenVPN\bin>openvpn clientConfigurationFile
In this case, “clientConfigurationFile” is “client1.ovpn”.
If you want to look more on the configuration file, you will find out it looks as follows:
client
dev tun
proto udp
remote 62.168.19.185 1194
resolv-retry infinite
nobind
persist-key
persist-tun
ca ca.crt
cert client1.crt
key client1.key
comp-lzo
verb 3
The field “remote 62.168.19.185 1194” means: the VPN server is with public IP address 62.168.19.185 UDP port 1194 . Please notice that this is used to establish the tunnel in the public network. Usually, you do not need to touch this file at all. But if you do not follow our suggestion to deploy VPN server on the same machine where the firewall resides, you have to manually modify the IP address that fit your setting. Only when VPN server is installed on the firewall between your private network and Internet, the correct configuration file will be generated. But those scenarios would make your network very complicated because you have to fix routing tables in a lot of places.
Example: Another simple method to launch VPN client on Windows PC
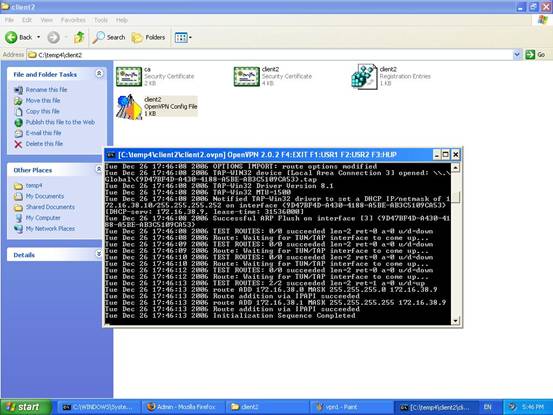
There is another easy way for you to launch VPN client on Windows. You can just find the configuration file and “using the Right Mouse Button to click it” as follows:
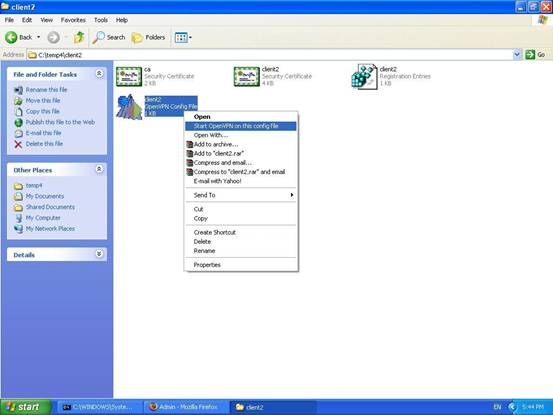
A submenu will show up. You can just select “Start OpenVPN on this config file”. Then, the process will be started. After you find the words like “Succeed” and “Initialization Sequence Completed”, you can minimize it and start other application to connect the server(s) inside your office.
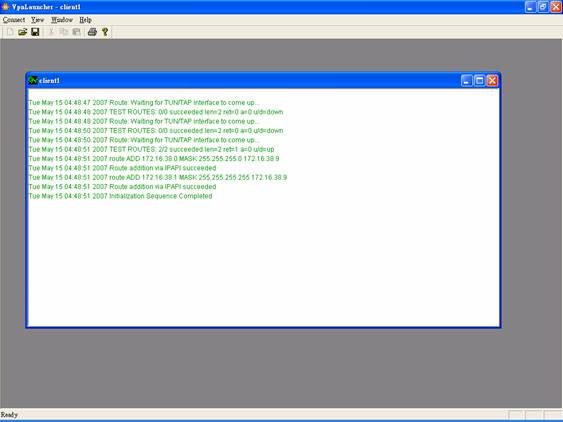
We have another program “VpnLauncher” that is easier to manage your VPN connection. But that is not included in the CD package.
How to Launch VPN client on Windows Vista PC
The VPN client program will take the setting pushed from the VPN server and change the routing table on the client. Modifying routing table on Windows station needs “Administrator” privileges. In other words, you need to run VPN client program by using the user account that is with “administrator” privileges. On Windows XP, it can be done by assigning that user into administrator group.
However, on Windows Vista, the same scheme does not work. Microsoft changes the user account privilege on Windows Vista that the account in administrator group does not imply it can perform the same job as “real” administrator.
On Windows Vista, the “administrator” account is hidden by default; the login screen does not display that “administrator” icon for you to use if you did not change the setting on your Vista PC. Along with the VPN key provided from the VPN server along with the recent release of Azblink SBC+, a directory “Vista” can be found to enable “administrator” account. Inside that directory, you can find two “batch files”:
adminEnable
adminDisable
The two scripts are for the usage on Windows Vista to turn on or turn off the administrator icons on the login page.


To use “adminEnable”, you need to launch it by using right mouse button to “click and focus” the file and run it as “administrator” from the menu there. After that, logout from the Windows Vista. You will find out “administrator” icon shown on the login screen.
You should login by using “administrator” account and launch VPN program under that account. |