Web Caching
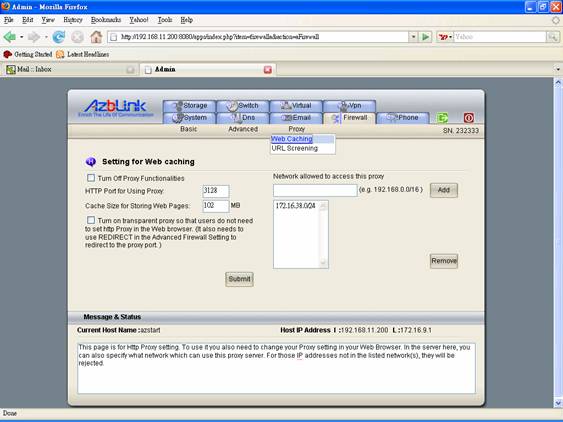
The web caching here is to store html pages that are previously accessed before so that the clients do not have to connect to the remote hosts if the same pages are requested. However, to cache the result of http request of people, you have to let people know how to connect this http proxy server. If you have setting in Border Control->Proxy->Web Caching as follows:
HTTP Port for Using Proxy: 3128
This stands for the proxy server is at TCP port 3128 of this machine. If the LAN interface is with IP address 192.168.1.1, then you can ask people to use 192.168.1.1 TCP port 3128 as the proxy setting in the Web browser. ( Please refer to the example at the end about how to set proxy in your Windows Web browser. ) Furthermore, if the virtual Ethernet interface created by VPN is with IP address 172.16.38.1 on VPN server along with http proxy, the people in VPN should just use 172.16.38.1 TCP port 3128 if they want their http requests back to the office to reach the destination they want to visit.
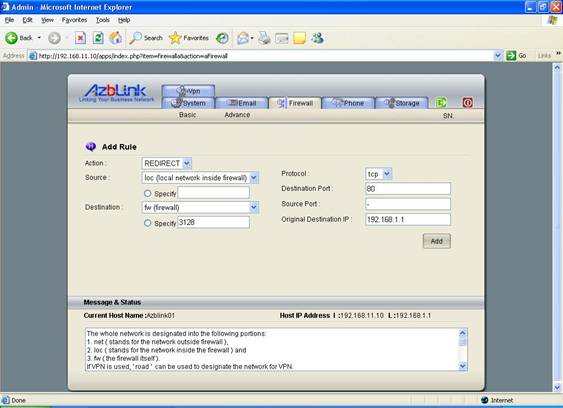
For using this Web AP Proxy, the TCP port needs to be specified so that the clients can use this port for their http traffic. You might want to force all the http traffic going through this http proxy even if they do not set proxy in their web browser. This can be done by using “REDIRECT” action in the firewall to force all the normal http traffic go to this proxy port so that each client does not have to set http in the web browser. Use Border Control->Advanced->Add Rule:
Action: REDIRECT
Source: loc
Destination: 3128
Protocol: TCP
Destination port: 80
Source port: -
Original Destination IP: 192.168.1.1
( 192.168.1.1 is firewall’s LAN IP address ).
Cache size is another important parameter. If you set the cache size too large, a lot of web pages will be accumulated in the proxy server. Every time when there is a request, the proxy server has to look into the cache and check if it should fetch from the remote side. It depends on the access pattern of your traffic to choose appropriate cache size.
You also can specify the network that is allowed to access this proxy. This is to prevent the usage of the proxy from somewhere you are not aware of. Or you want block certain types of users by their IP addresses in the subnet, you can just use this function here. This is to block the users so that those users can not access http proxy. In other words, if this is the only way to browse Internet in your office environment, those machines in that network can not Web browser to browse Internet.
For those machines allowed to access the Internet, you might want to block some websites so that they can not view the content of those websites. In that cast, you should use the method introduced below.
URL Screening
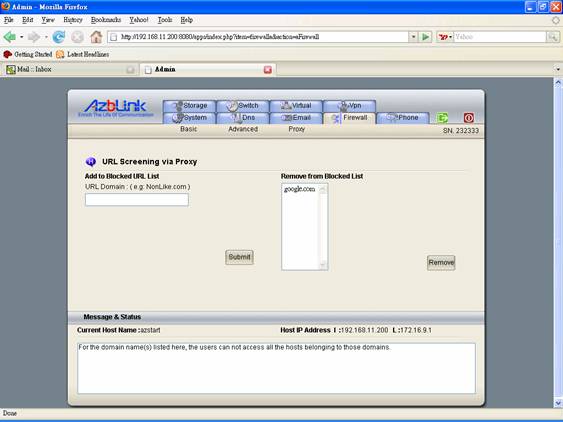
You can just specify the domain name to block a class of URL belonging to that domain. All the URLs extending from that domain will not be accessed by the clients of the proxy. The blocked URL domains will be listed so that all the related URLs will not be viewed by the clients.
For example, if you put “nodomain.com” in the list, for URL like www.nodomain.com, www.nodomain.com/help.html, mimi.nodomain.com, ddd.nodomain.com will all be blocked.
Example: How to set Proxy in Web Browser
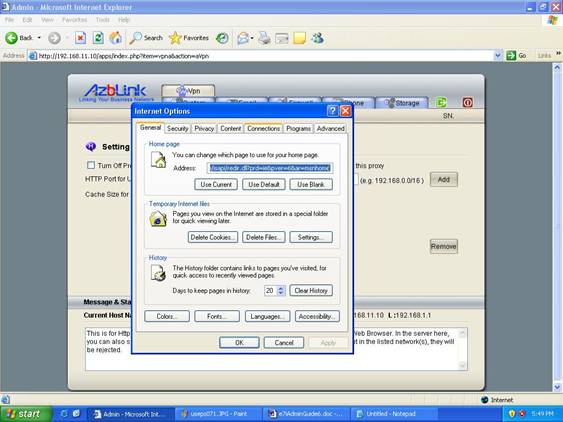
The following is the step for set http proxy in Microsoft Internet Explorer.
SelectTools->Internet Options
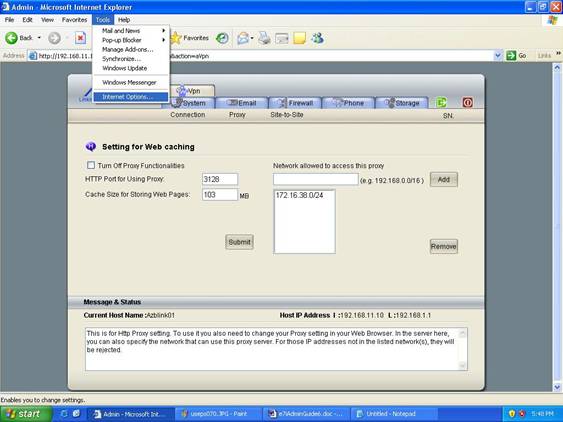
It shows a menu as follows. Click “Connections” on the top:
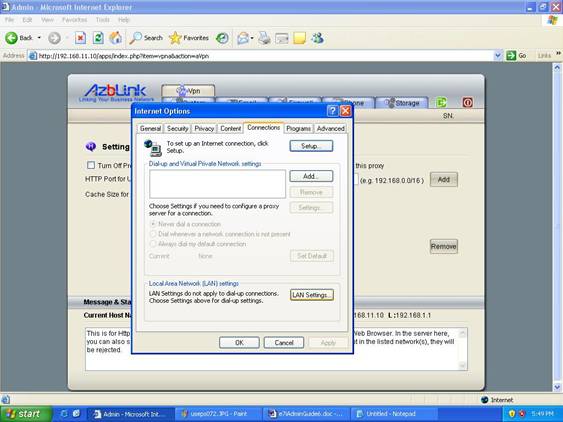
Click “LAN Setting” at the bottom after you switch to “Connections” .
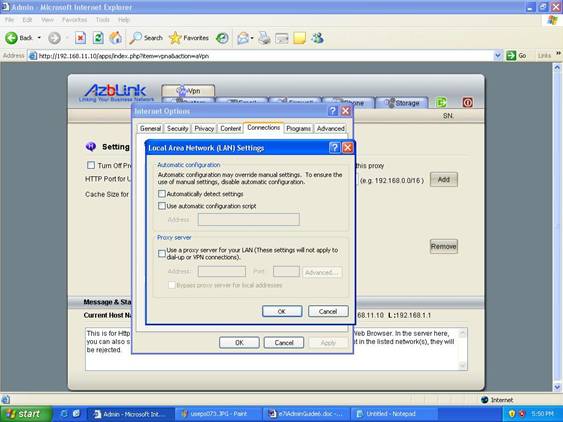
Up to this stage, you click the box for use proxy server. You can just ignore those wording about VPN setting in Microsoft Internet Browser. It refers to the VPN solution from Microsoft, not the VPN package we provide along with out software.
Transparent Http Proxy for Application Layer Border Control
In some cases, you might want to block users to access a specific website. But unfortunately, that website is consisted of a collection of hosts with multiple IP addresses; you have no idea on how to catch all the IP addresses and put those IP addresses on the block list. In this case, you need application layer logic and you have to combine several modules to do this task.
The operation principle is quite easy: “REDIRECT” all the outgoing http traffic to “http proxy” and do the access control on “http proxy”. Currently, http proxy is placed under Border Control->Proxy.
If “http proxy” is listening in the port 3128, you can use the following procedures to block a website:
From Border Control->Advanced->Add Rule, set
Action: REDIRECT
Source: loc
Destination: 3128
Protocol: TCP
Destination Port: 80
Source Port: -
Original Destination IP: !172.16.9.1
( assume 172.16.9.1 is the IP address of eth1; you do not want to block your access to the firewall via Web browser )
And from Border Control->Proxy->Web Caching, turn on “Transparent Proxy”.
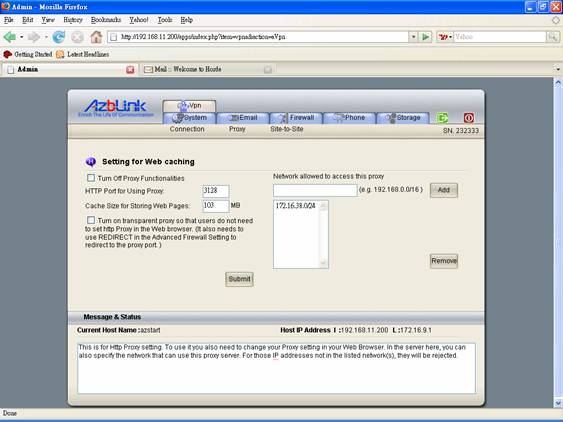
Do not forget to set the network that is allowed to access this proxy. For those IP addresses not being listed in the network list, they are not allowed to use this http proxy.
And in Border Control->Proxy->URL Screening, you can add the domain names you would like to block so that users will not be able access those web pages.
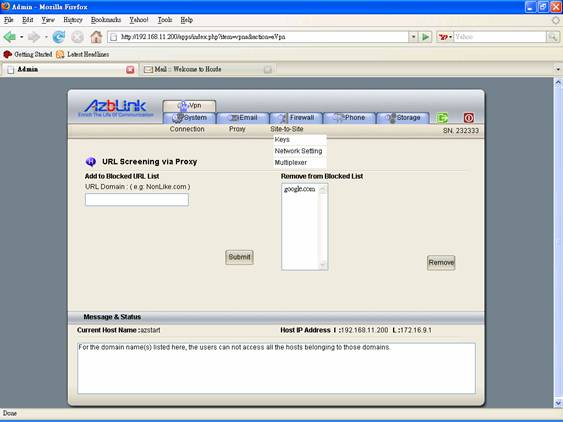
This approach is applicable to other network application in addition to “http” as long as the proxy servers exist for those applications.
Rate Limit Control
To protect the application on the machine is overloaded by unexpected large volume of network request, it would be better to consider about the connection limit. The firewall allows to set the number of “new” connections in the sense of “Average” and “Burst Rate”. The “Average” means the system will take the average since it is running and check if the current average is over the limit. If it is over the limit, it will reject the new connection. For “Burst” rate, it just regulates the upper limit in any instant.
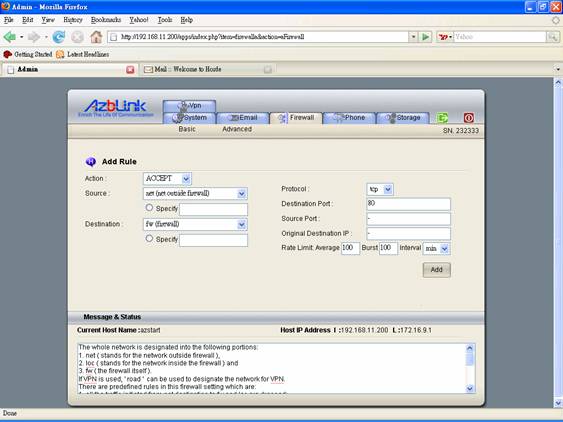
Please notice that the limit set here is for “new” connections. For the connection already established, it will not drop. So, if a connection is there for quite a long time, it might block the new comers to use the service. |